Prerequisites
- An active Arkan account with BIM module permissions
- A project must be selected before accessing the BIM module
- IFC files exported from your authoring tool (Revit, ArchiCAD, Tekla, etc.)
- IFC files must be
.ifcformat and under 100 MB per upload - A modern browser with WebGL support (Chrome, Edge, or Firefox recommended)
Overview
The BIM module brings 3D model management directly into the Arkan project workflow. You can upload IFC models organized by discipline, view them in an interactive 3D viewer, run automated clash detection between disciplines, inspect element properties, navigate the spatial hierarchy, search for specific elements, and create RFIs linked to precise 3D locations. Every RFI created from the viewer captures a camera viewpoint and screenshot, so reviewers can jump back to the exact context later.
The module is organized around five main screens:
| Screen | Purpose |
|---|---|
| Model List | Browse, search, filter, and manage all uploaded models |
| Upload Model | Upload a new IFC file with discipline metadata |
| 3D Model Viewer | Interactive 3D viewer with tree, search, properties, and RFI creation |
| Clash Detection | Create, monitor, re-run, and delete clash tests |
| Clash Results Detail | Review individual clash results, change statuses, fly to clashes, and create RFIs |
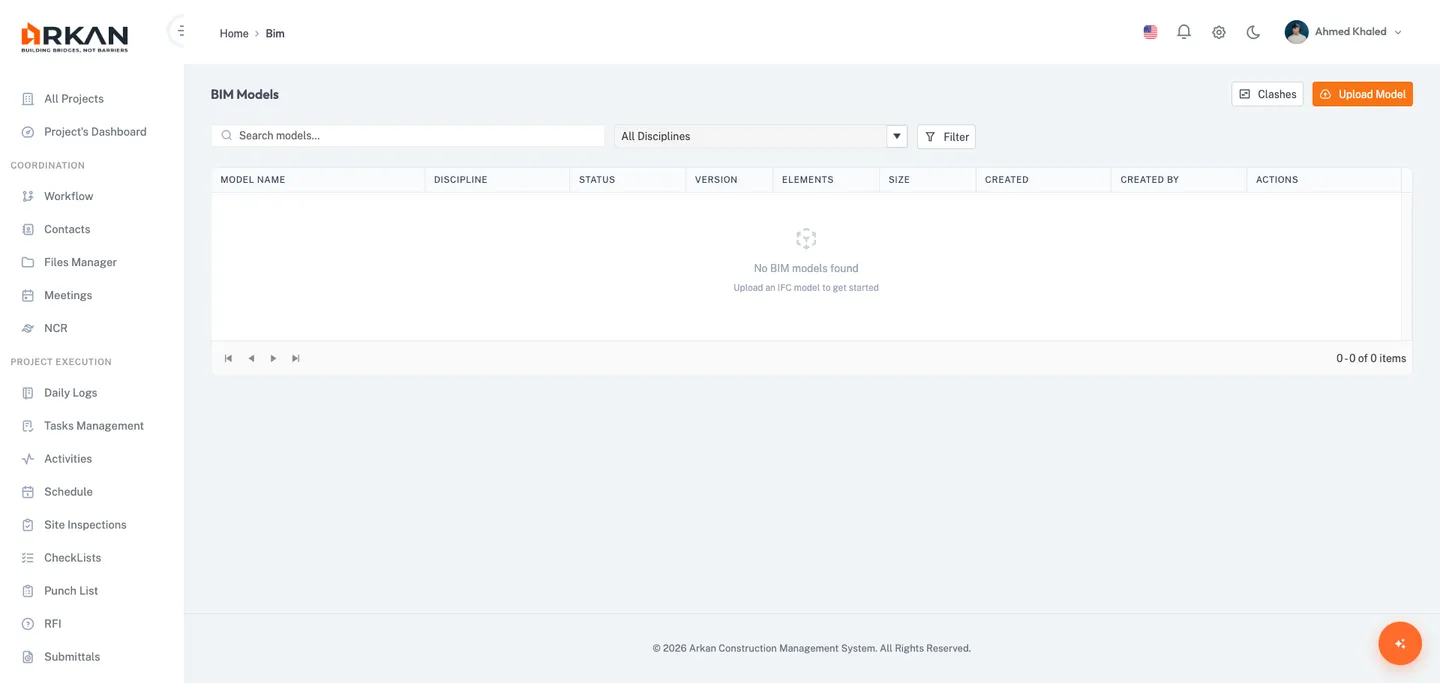
Model List
The landing page displays all uploaded IFC models in a paginated, sortable grid.

Grid Columns
| Column | Description |
|---|---|
| Model Name | Display name with a 3D cube icon |
| Discipline | Architecture, Structure, MEP - Mechanical, etc. |
| Status | Uploading, Processing, Ready, or Failed |
| Version | Current version number |
| Elements | Number of IFC elements detected |
| Size / Created / Created By | File size, upload date, uploader |
| Actions | View in 3D Viewer (eye icon) and Delete (bin icon) |
Search by keyword, filter by discipline. The View button is disabled until model status is Ready.
Warning: Deleting a model is irreversible. Linked clash tests and RFIs will lose their 3D context.
Uploading a Model
Click Upload Model from the Model List page.
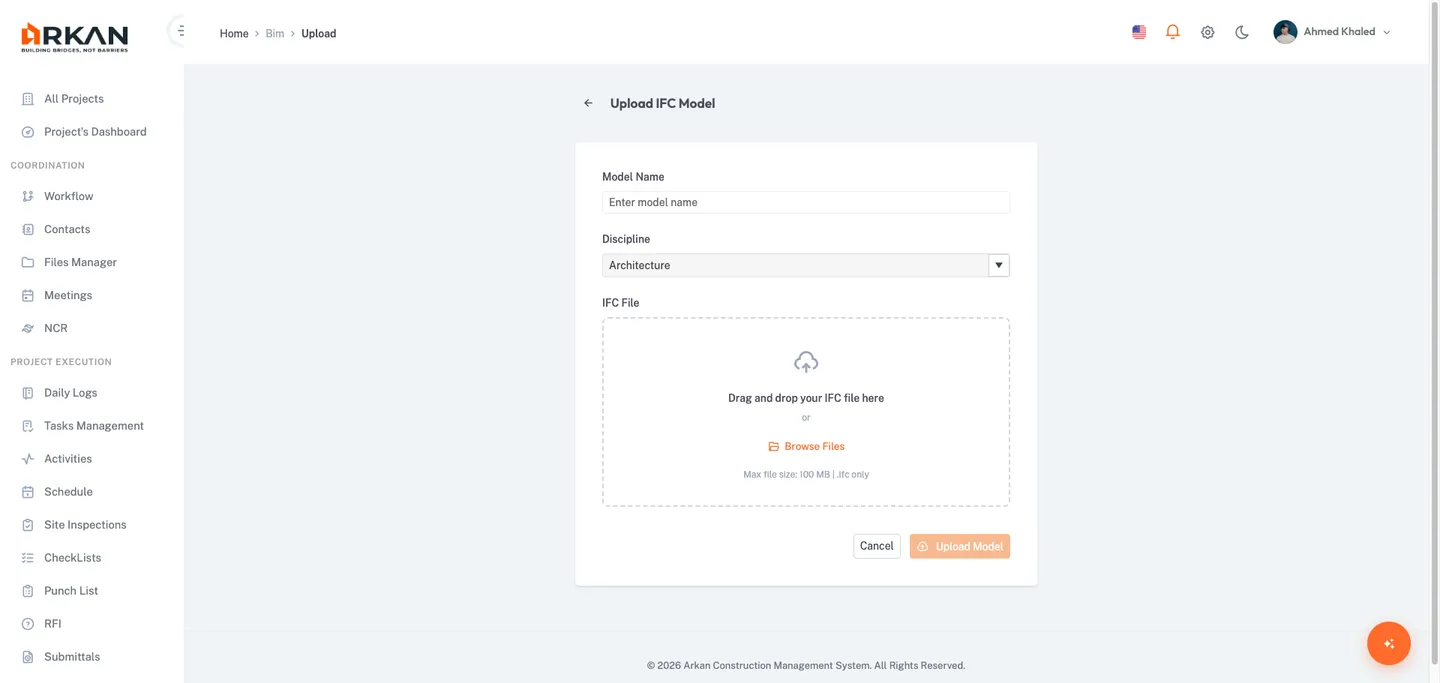
| Field | Required | Description |
|---|---|---|
| Model Name | Yes | Auto-filled from filename if left blank |
| Discipline | Yes | Architecture, Structure, MEP - Mechanical, MEP - Electrical, MEP - Plumbing, Civil |
| IFC File | Yes | .ifc file, max 100 MB |
Drag and drop or click Browse Files. A progress bar appears during upload. After upload, the model processes server-side (status transitions: Uploading > Processing > Ready).
Tip: If a model remains in
Processingfor more than 15 minutes, contact your system administrator.
3D Model Viewer
A full-screen, interactive environment for exploring IFC models.

Layout
| Area | Description |
|---|---|
| Top Bar | Back button, model name, panel toggles, selected element badge |
| Left Panel | Tabbed: Model Tree and Search |
| 3D Canvas | Central viewport with orbit, pan, and zoom |
| Floating Toolbar | Navigation tools, view controls, and action buttons |
| Right Panel | Tabbed: Properties, Issues, and Clashes |
Navigation Tools
Orbit (rotate), Pan (move), Zoom, Fit All, Show All (un-hide), Model Tree toggle, Properties toggle, Create RFI, Toggle Issue Markers.
Selecting Elements
- Single click to select (highlights blue, shows properties)
- Double-click to zoom to element
- Right-click for context menu with Create RFI option
- Click empty space to deselect
Model Tree
Displays the spatial hierarchy: Project > Site > Building > Building Storey > Elements.
Expand/collapse nodes, click to select and zoom. Right-click for Zoom To, Isolate, or Hide actions. Selection syncs between the tree and 3D canvas.
Element Search
Server-side search across all elements by name and GUID, with filtering by IFC entity type and storey.

Results paginated at 25 per page. Click a result to select and zoom to it in the viewer.
Properties Panel
Properties Tab
Shows IFC property data for selected elements: Identity (GUID, Entity Type, Name), and collapsible property groups (e.g., Pset_WallCommon, BaseQuantities).
Issues Tab
Lists RFIs linked to model elements. Click an issue to highlight the linked element and zoom to the saved viewpoint.
Clashes Tab
Shows clash context (Element A in red, Element B in blue) when navigating from a clash result.
Clash Detection
Navigate via Sidebar > BIM > Clashes.
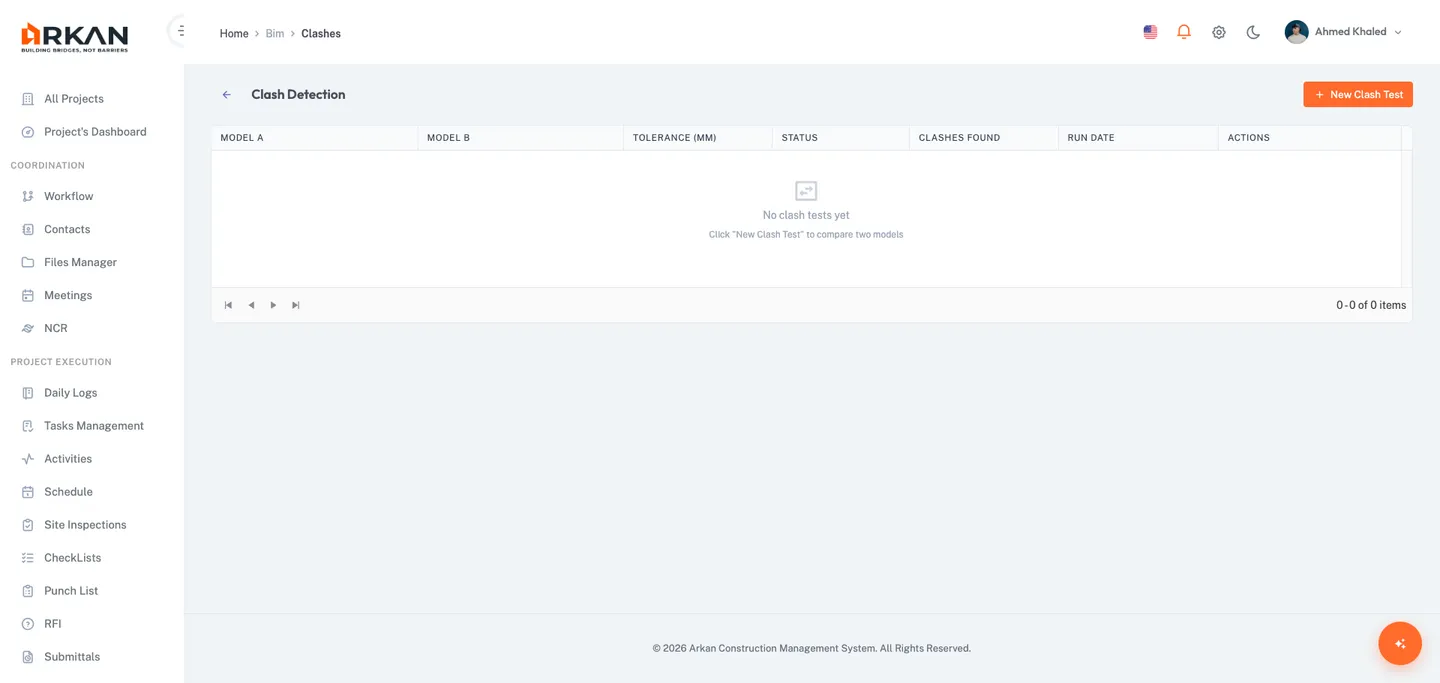
Creating a Clash Test
- Click New Clash Test
- Select a model (
Readystatus only) and set tolerance in mm (default: 10, range: 1-5000) - Click Run Clash Test -- runs in background
Clash Tests Grid
Columns: Model A, Model B, Tolerance, Status (Pending/Running/Complete/Failed), Clashes Found, Run Date, Actions (View Results, Re-Run, Delete).
Tip: Lower tolerance values catch tighter clashes but produce more results.
Clash Results Detail

Filter by status (New, Active, Resolved, Approved) and storey. Grid shows Element A, Element B, Storey, Status (editable dropdown), and Actions.
Clash Status Workflow
| Status | Meaning |
|---|---|
New | Not yet reviewed |
Active | Under investigation |
Resolved | Design conflict fixed |
Approved | Resolution verified |
Fly To opens the 3D viewer with elements highlighted. Create RFI opens a pre-filled RFI dialog.
Creating an RFI from the 3D Viewer
Open via toolbar button, context menu, or clash results. The dialog captures the current viewpoint and screenshot.

| Field | Required | Description |
|---|---|---|
| Subject | Yes | Auto-populated from element context |
| Question | Yes | Min 20 characters |
| Category / Discipline | Yes | Project-configured categories |
| Priority | No | Normal, High, or Urgent |
| Due Date | No | Defaults to 7 days from today |
| Send to workflow now | No | Toggle; reveals Workflow Template and Assignee fields |
On success, issue markers refresh in the 3D viewer.
Issue Markers
Orange pin markers appear at linked elements' locations. Click a marker to see the corresponding issue card in the Issues tab. Toggle visibility with the pin icon in the toolbar.
View in Model Button
When viewing an RFI created from BIM, click View in Model on the RFI detail page to restore the saved viewpoint and highlight the linked element.
Keyboard and Mouse Controls
| Action | Input |
|---|---|
| Orbit | Left-click and drag |
| Pan | Right-click and drag, or middle-click and drag |
| Zoom | Scroll wheel |
| Select | Left-click on element |
| Zoom to element | Double-click |
| Context menu | Right-click on selected element |
Troubleshooting
| Problem | Solution |
|---|---|
Model stuck in Processing | Wait up to 15 minutes. If it persists, contact your administrator. |
| Blank 3D canvas | Ensure browser supports WebGL. Refresh page. Disable extensions blocking WebGL. |
| Upload fails | Check network, ensure file is under 100 MB with .ifc extension. |
| Element not found when opening viewpoint | Model may have been updated. Re-create the RFI from the current version. |
| Clash test stuck in Pending/Running | Refresh page. If stuck, re-run the test. |
| Issue markers not visible | Toggle the pin icon in the toolbar. Ensure model has linked RFIs. |
| Panels disappeared | Click panel toggle buttons in the top bar or floating toolbar. |
Back to: Help Center