Prerequisites
- You have an active Arkan account with the appropriate permissions assigned to your role.
- A project has been selected in the project selector (top navigation bar).
- For Contacts: your role must have Retrieve permission for Company Contacts or Person Contacts (or both).
- For Notifications: all authenticated users receive notifications automatically -- no additional permissions are required.
Tip: If you see a lock icon or "Access Denied" message on the Contacts page, contact your system administrator to verify that Retrieve permission is enabled for your role.
Section 1: Company Contacts
Company contacts represent the organizations your project interacts with -- clients, consultants, subcontractors, suppliers, and other stakeholders.
1.1 Navigating to Company Contacts
Navigation: Sidebar > Contacts
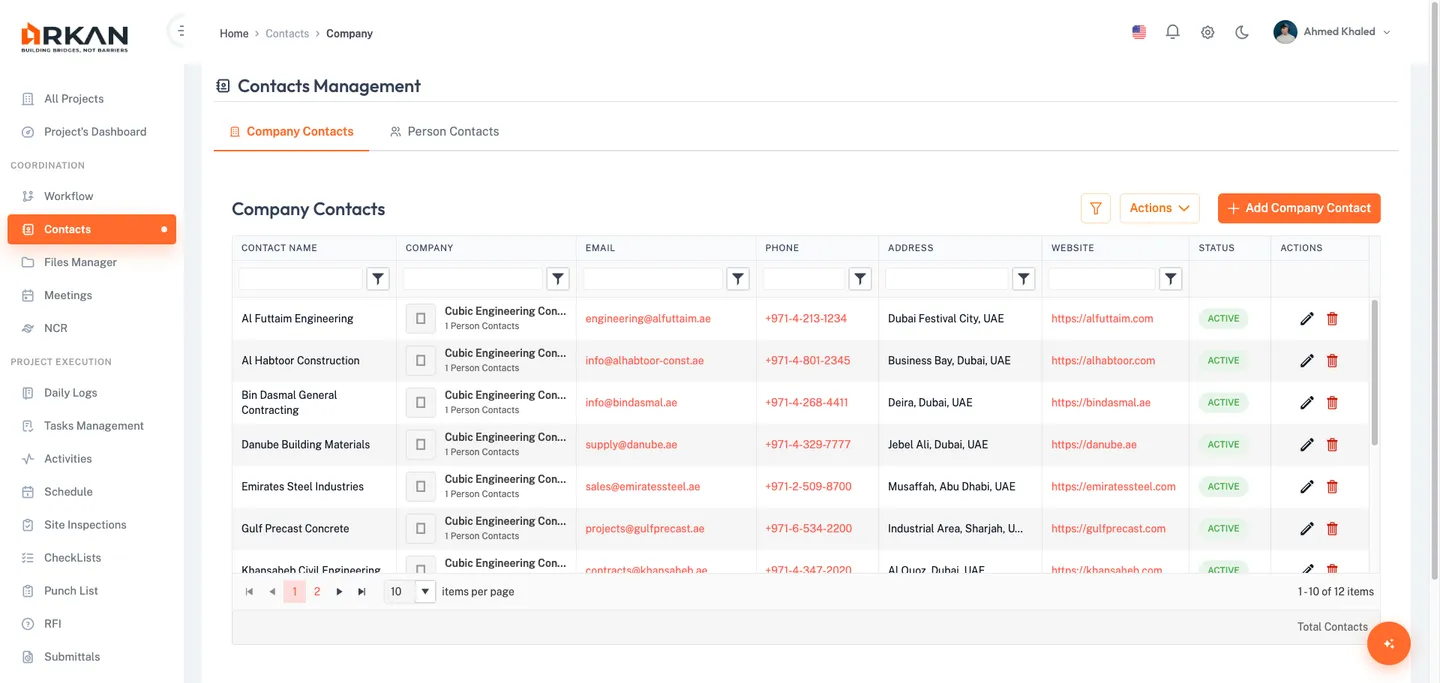
The Contacts page opens with two tabs: Company Contacts and Person Contacts. The Company Contacts tab is selected by default.
1.2 Header Actions
| Control | Description |
|---|---|
| Filter Toggle | Shows or hides the filter panel |
| Actions Dropdown | Additional bulk actions for the contact list |
| Add Company Contact | Opens the form to create a new company contact (visible only with Insert permission) |
1.3 Filter Panel
Click the Filter Toggle button to reveal the filter panel:
- Type a search term in the Search field to filter across contact names, emails, and other fields.
- Toggle Show Inactive to include or exclude inactive contacts in the results.
- Click the Clear button to reset all filters.
The grid updates immediately as you type. Results reset to the first page after any filter change.
1.4 Company Contacts Grid
| Column | Description |
|---|---|
| Contact Name | Name of the company contact |
| Company | Company logo, name, and person count |
| Clickable mailto link | |
| Phone | Phone number |
| Mobile Phone | Mobile phone number |
| Address | Physical address |
| Website | Company website URL |
| Department | Department within the organization |
| Status | Active (green badge) or Inactive (gray badge) |
| Actions | Edit and Delete buttons (conditional on permissions) |
Grid features: Pagination (5/10/20/50/100 rows per page), sortable columns, resizable columns.
1.5 Adding a Company Contact
- Click the Add Company Contact button in the header.
- Fill in the required fields:
- Name (required, max 200 characters)
- Email (required, valid email format, max 100 characters)
- Phone (required, max 20 characters)
- Optionally fill in additional fields:
- Website (max 200 characters)
- Address (max 500 characters)
- Notes (max 1000 characters)
- Click Save.
The dialog closes and the new company contact appears in the grid with Active status.
Tip: Use the Notes field to record important context about the relationship, such as contract references or key personnel names.
1.6 Editing a Company Contact
- Click the Edit action button on the row you want to modify.
- Update any fields. In edit mode, the Status Toggle is also available to set Active or Inactive.
- Click Save.
The dialog closes and your changes are reflected in the grid.
1.7 Deleting a Company Contact
- Click the Delete action button on the contact row.
- Confirm the deletion in the dialog that appears.
The contact is removed from the grid.
Warning: Deleting a company contact may affect person contacts that reference it. Verify there are no dependent person contacts before deleting.
Section 2: Person Contacts
Person contacts represent individual people associated with your company contacts. Each person is linked to exactly one company contact.
2.1 Navigating to Person Contacts
- Navigate to Sidebar > Contacts.
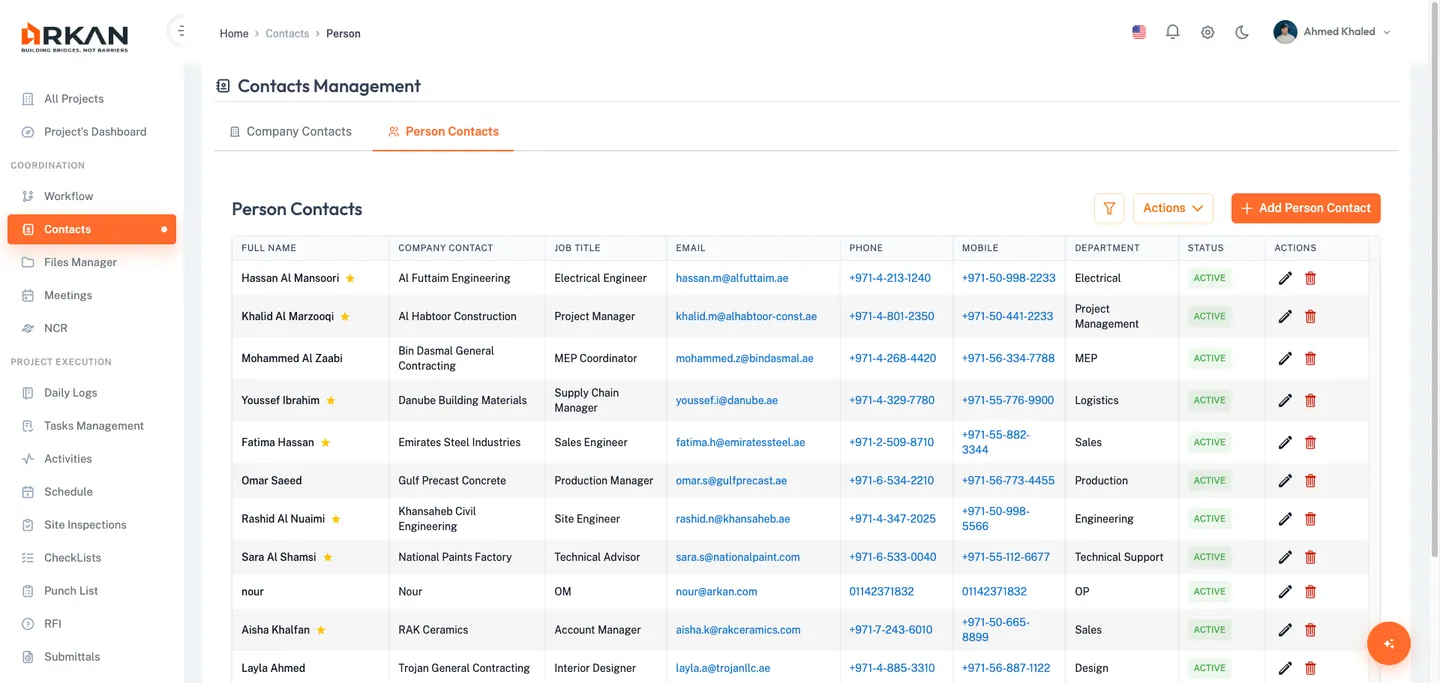
- Click the Person Contacts tab.
The Person Contacts grid loads with all person contacts for the current project.
2.2 Header Actions
| Control | Description |
|---|---|
| Filter Toggle | Shows or hides the search and filter panel |
| Actions | Additional bulk actions |
| Add Person Contact | Opens the form to create a new person contact (requires Insert permission) |
2.3 Filtering Person Contacts
- Type in the Search field to filter by name.
- Toggle Show Inactive to include or exclude inactive person contacts.
Results update as you type.
2.4 Person Contacts Grid
| Column | Description |
|---|---|
| Full Name | Person's full name, with a star badge if they are the primary contact |
| Company Contact | The associated company contact |
| Job Title | Person's job title |
| Clickable mailto link | |
| Phone | Clickable tel link |
| Mobile Phone | Clickable tel link |
| Department | Department within the company |
| Status | Active (green badge) or Inactive (gray badge) |
| Actions | Edit and Delete buttons (conditional on permissions) |
Grid features: Pagination (5/10/20/50/100 rows per page), sortable columns, resizable columns.
2.5 Adding a Person Contact
- Click the Add Person Contact button.
- Fill in the required fields:
- Full Name (required, max 200 characters)
- Company Contact (required, select from dropdown)
- Email (required, valid email format, max 100 characters)
- Optionally fill in additional fields:
- Job Title (max 200 characters), Phone (max 20 characters), Mobile Phone (max 20 characters)
- Department (max 100 characters), Notes (max 1000 characters)
- Is Primary toggle -- marks this person as the primary contact for the selected company
- Click Save.
The dialog closes and the new person contact appears in the grid with Active status.
Tip: Only one person can be the primary contact per company. Setting a new primary contact automatically removes the primary flag from the previous one.
2.6 Editing a Person Contact
- Click the Edit action button on the person row.
- Modify fields as needed. The Status Toggle is available in edit mode.
- Click Save.
Your changes are saved and the grid updates.
Section 3: Notification Center
The Notification Center provides a full-page view of all your notifications, with tools for filtering, selecting, and managing read status in bulk.
3.1 Navigating to the Notification Center
Navigation: Sidebar > Notifications or click View All Notifications in the topbar notification dropdown.
The Notification Center opens displaying the header "Notifications" with the subtitle "All your recent updates and mentions".
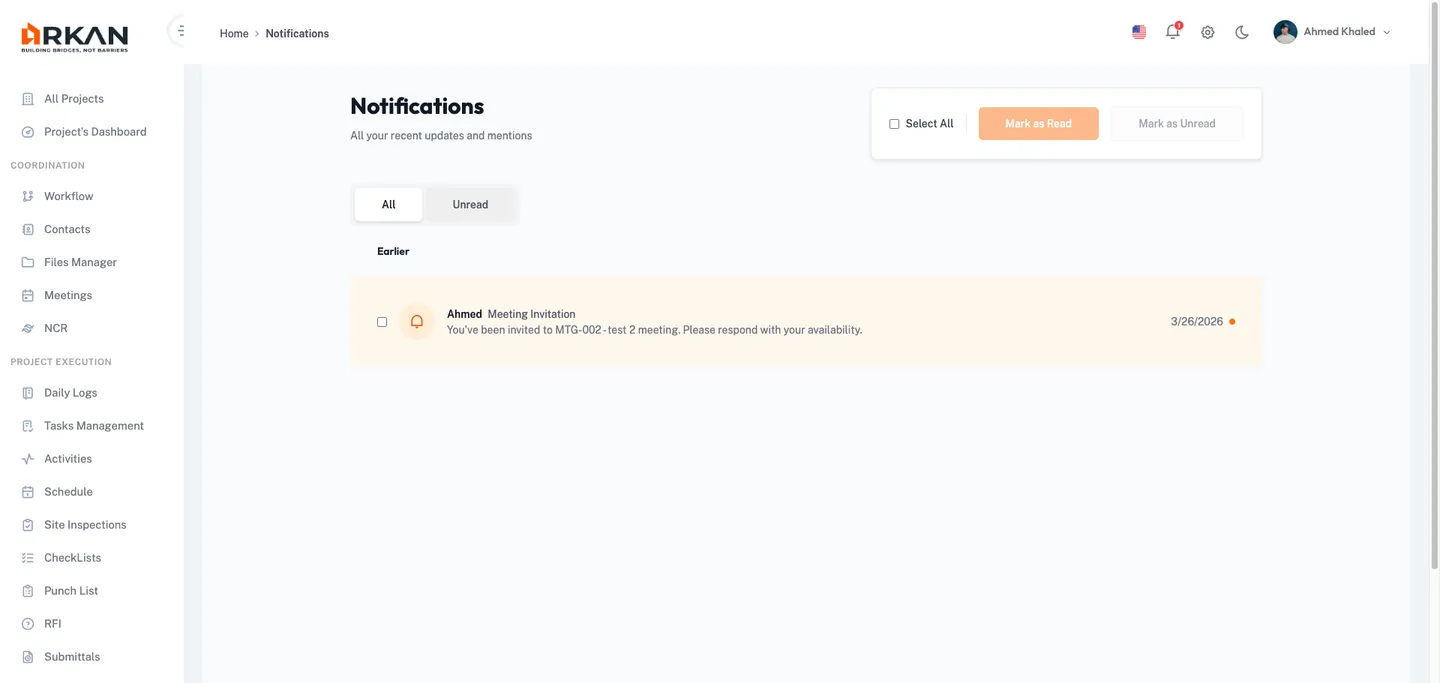
3.2 Bulk Actions
The bulk action bar in the page header provides:
- Select All checkbox -- selects or deselects all visible notifications.
- Mark as Read button -- marks selected notifications as read (disabled when nothing is selected).
- Mark as Unread button -- marks selected notifications as unread (disabled when nothing is selected).
Selected notifications update their status immediately. The selection clears after the action completes.
3.3 Filter Tabs
| Tab | Description |
|---|---|
| All | Displays all notifications (default) |
| Unread | Displays only unread notifications |
Click a tab to switch the view. The notification list updates immediately.
3.4 Notification Grouping
Notifications are grouped chronologically under the following date headers:
- Today -- notifications received today
- Yesterday -- notifications received yesterday
- Earlier -- all older notifications
Empty groups are automatically hidden.
3.5 Notification Items
Each notification item displays:
| Element | Description |
|---|---|
| Checkbox | For bulk selection |
| User Avatar | Photo of the user who triggered the notification (falls back to an icon) |
| User Name | Name of the user who triggered the notification |
| Title | Action description (e.g., "commented on your drawing") |
| Message | Additional detail text |
| Time Ago | Relative timestamp (e.g., "5m ago", "2h ago", "3d ago") |
| Unread Indicator | Orange dot and highlighted background for unread notifications |
To read and navigate: Click anywhere on the notification row.
The notification is marked as read and the system navigates to the linked page (e.g., drawing, inspection request, or task).
3.6 Pagination
When you have more than 20 notifications, pagination controls appear at the bottom:
- Click Previous to go to the prior page.
- Click Next to advance to the next page.
The page indicator shows your current position (e.g., "Page 1 of 5").
Section 4: Real-Time Notifications
Arkan delivers notifications in real time using SignalR, so you are informed immediately without refreshing the page.
4.1 Bell Icon and Unread Badge
The notification bell icon appears in the top navigation bar. When you have unread notifications, an orange badge displays the unread count.
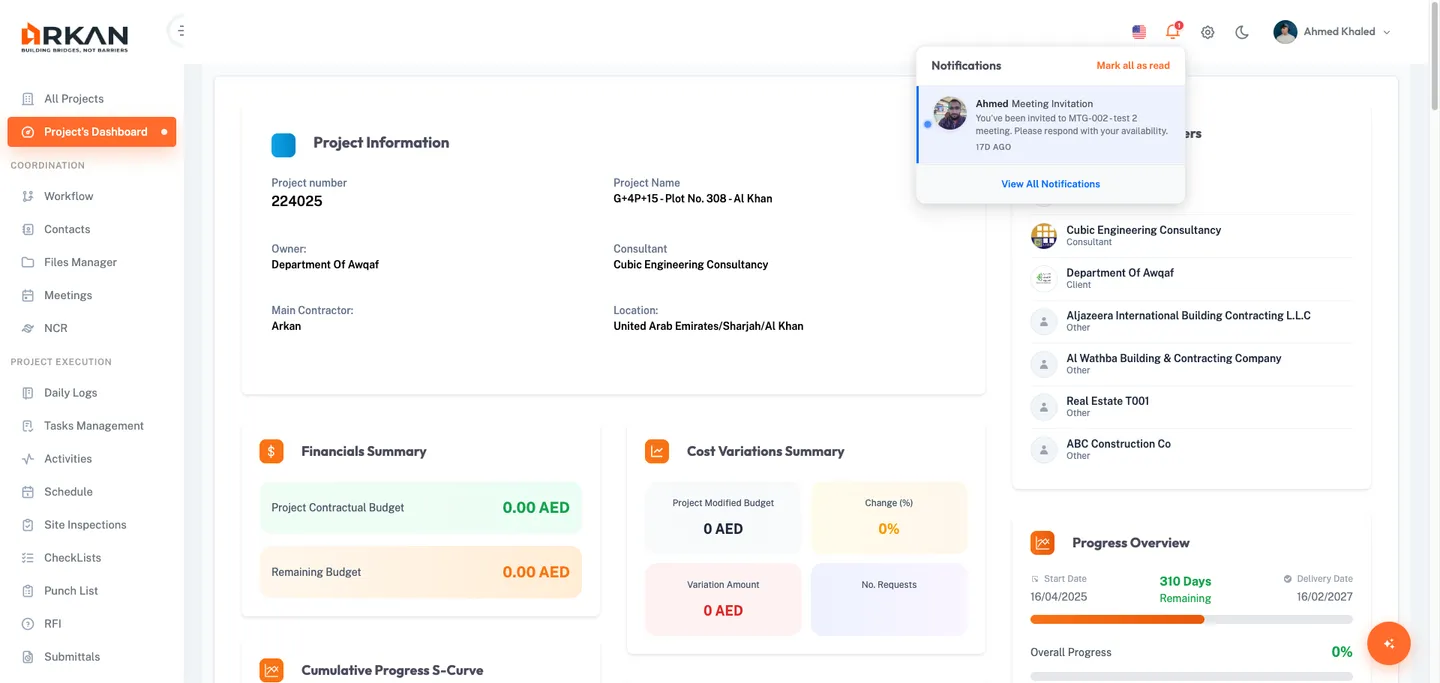
4.2 Notification Dropdown
Click the bell icon to open the notification dropdown:
| Element | Description |
|---|---|
| Header | Displays "Notifications" title |
| Mark All As Read | Link visible when unread notifications exist; marks all as read |
| Notification List | Up to 10 recent notifications with avatar, author, title, message, and timestamp |
| Unread Indicator | Blue dot next to unread items with highlighted background |
| Empty State | Displays "No any notifications" when the list is empty |
| View All Notifications | Footer link navigating to the full Notification Center |
The dropdown auto-refreshes its content each time you open it.
4.3 Notification Types
| Type | Icon | Description |
|---|---|---|
| DrawingComment | Document icon | Someone commented on a drawing |
| InspectionRequest | Search icon | An inspection request was sent |
| WorkflowRequest | Flow chart icon | A workflow action was taken |
| TaskAssigned | Task icon | A task was assigned to you |
| TaskComment | Chat icon | Someone commented on a task |
Tip: Clicking any notification in the dropdown marks it as read and navigates directly to the relevant page.
Section 5: Managing Notifications
5.1 Marking Individual Notifications as Read
- From the dropdown: Click any notification to mark it as read and navigate to its linked page.
- From the Notification Center: Click the notification row to mark it as read and navigate.
5.2 Marking All as Read
- From the dropdown: Click the Mark All As Read link in the dropdown header.
- From the Notification Center: Check Select All, then click Mark as Read.
5.3 Marking Notifications as Unread
- Navigate to the Notification Center (
/notifications). - Check individual notification checkboxes or use Select All.
- Click Mark as Unread.
The selected notifications return to unread status with the orange highlight and dot indicator.
5.4 Filtering Unread Notifications
- In the Notification Center, click the Unread filter tab.
Only unread notifications are displayed. Use this view to quickly identify items that need your attention.
Troubleshooting
I cannot see the Contacts page or I see a lock icon
Your role lacks the Retrieve permission for Company Contacts or Person Contacts. Contact your administrator under Settings > Roles & Permissions to request access.
The "Add Company Contact" or "Add Person Contact" button is missing
Your role needs the Insert permission for Company Contacts or Person Contacts respectively.
I cannot edit or delete a contact
Verify that your role has Update permission (for editing) or Delete permission (for deleting) under Settings > Roles & Permissions.
The Company Contact dropdown is empty when adding a person contact
Company contacts must exist before you can link person contacts to them. Create a company contact first.
I am not receiving real-time notifications
Verify you are logged in and your session has not expired. Check your browser's network connectivity -- SignalR requires an active connection. Try refreshing the page to re-establish the SignalR connection. If the issue persists, contact your system administrator to verify the notification hub is running.
The notification dropdown shows "No any notifications"
There are no notifications for your account. Notifications are generated when other users interact with items relevant to you (e.g., commenting on drawings, assigning tasks, or sending workflow requests).
Clicking a notification does not navigate anywhere
The notification may not have a valid link. This can occur if the linked item was deleted or if the notification was generated without a specific target page.
The unread count badge does not update
Open and close the notification dropdown to trigger a refresh. If the badge still does not update, refresh the browser page to re-establish the SignalR connection.
Next: Settings & Administration
Back to: Help Center